Pinterest is a great marketing tool because of its visual discovery nature. It helps to improve brand visibility, drive website traffic, and provides SEO benefits. Businesses can use tailored advertising to engage their audience and establish a community. Pinterest delivers metrics for performance tracking and trend spotting, making it a powerful platform for presenting products and services.
There are a lot of plugins and third party apps with which you can automate and auto-post from wordpress to pinterest boards. In this tutorial, we are going to learn how to automatically post to Pinterest from WordPress without the use of any plugin or app because pinterest allows you to import RSS feeds from your website directly into any of your Pinterest boards.
Steps To Auto-Post From WordPress To Pinterest
1. Create a Pinterest Account
If you don’t have a Pinterest account already, you can create one by going to www.pinterest.com and following the registration process. It’s really easy and straightforward.
2. Find Your WordPress RSS Feed URL
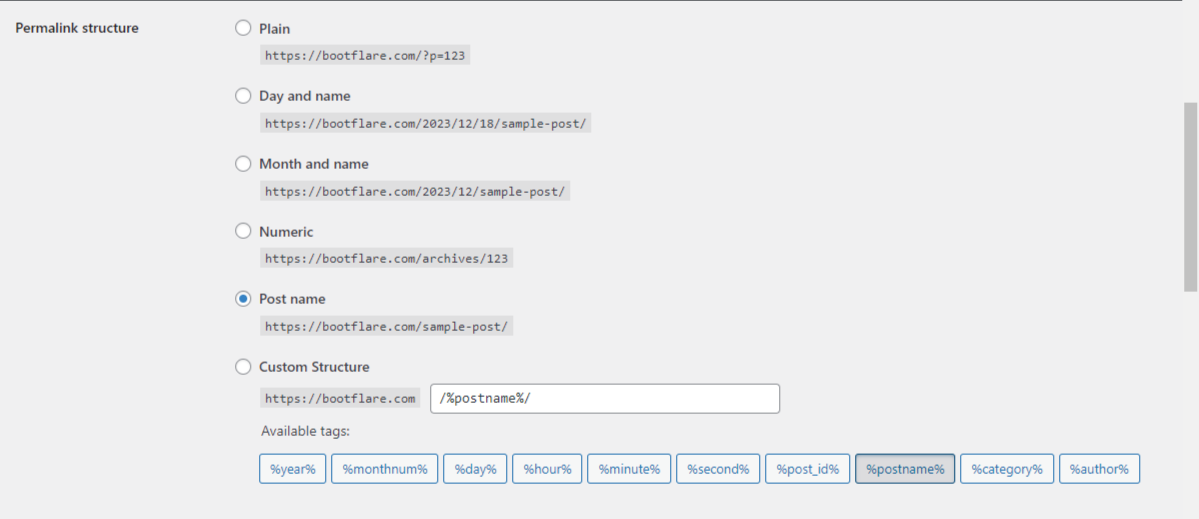
Find your RSS feed by adding a forward slash and “feed” at the end of your domain. Example www.yourwebsite.com/feed. Now once You hit enter, it’s going to take you to your site’s RSS feed. This will list every post published in a reverse chronological order, just like the blog and it updates dynamically. In other words, automatically every time you publish a new post. This will work for most people but there’s a chance that you might instead get a 404 error saying the page isn’t found. If that’s the case, it means you’re using the plain permalink settings. You will need to visit your permalink settings page.

Using the plain permalink setting is not a good SEO practice and not recommended for WordPress sites because the URL itself isn’t very informative. For instance, if you published a post and it was called sample post and you switched to the post name structure, then in the URL you can see “sample- post”, visitors and search engines can tell from the URL what they’re going to see on your site versus if that post has an ID of 123, you’ll see the post id instead and that doesn’t really tell much about the post.
If you’re using the plain permalink settings, your RSS feed will be located at www.yourwebsite.com/?feed=rss or www.yourwebsite.com/?feed=rss2
If you wish to find the RSS feed for a post category, for example, a post category named “branding”, it should be located on www.yourwebsite.com/category/branding/feed
3. Go to Settings on Your Pinterest Account
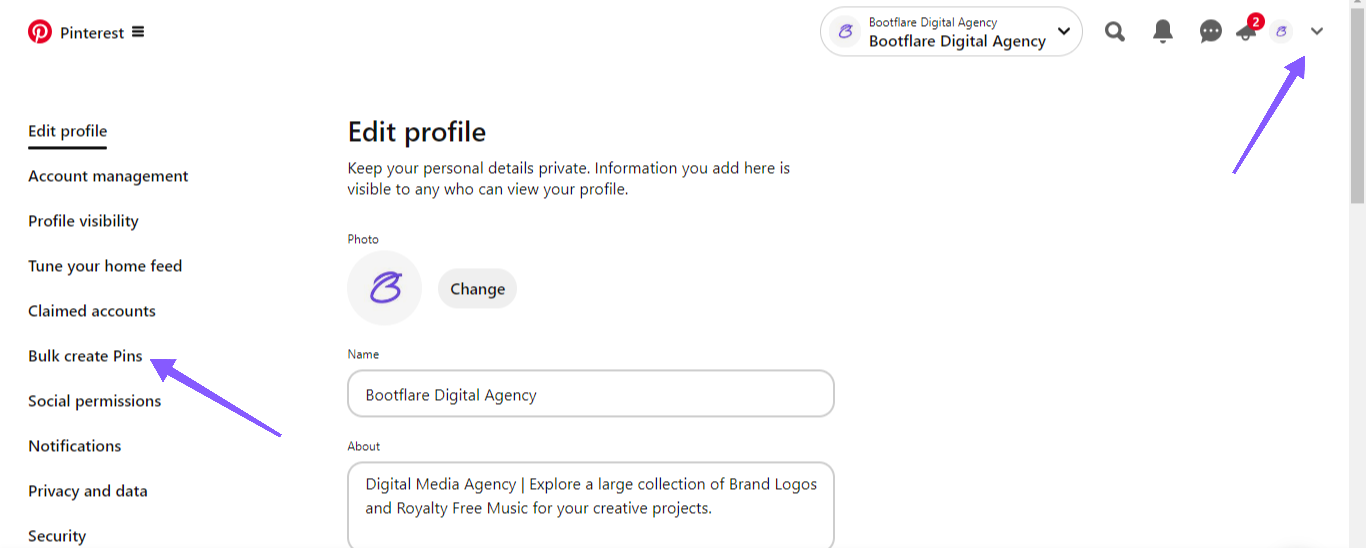
First click on the drop down arrow on the top right of your pinterest profile once you are logged in and then click on “settings”.
4. Click on "Bulk Create Pins"
Next, click on “bulk create pins” on the left hand side menu.

On the next screen, you can either import a csv file containing pins or add an RSS feed so that Pinterest receives the most recent updates immediately.
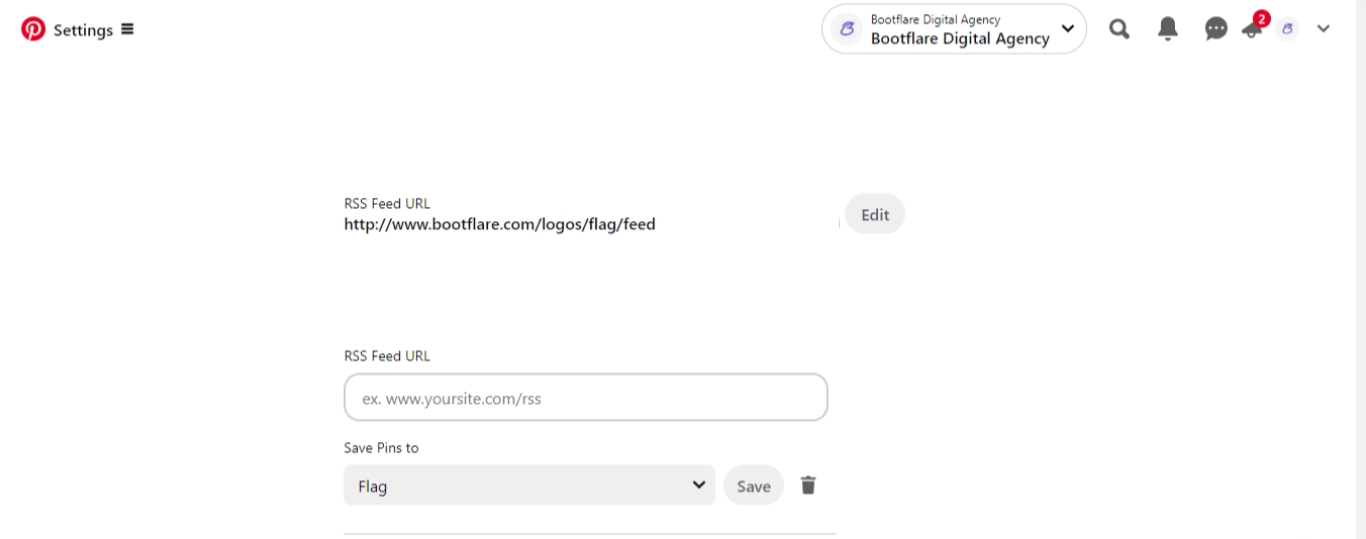
If you’re doing this for the first time, the auto publish section will be empty. Scroll down to click on the “add another” button.

5. Enter your WordPress RSS Feed
An empty field will appear for you to enter the RSS feed URL into the field. You need to select which board the pins should be posted to. Click on the drop-down and either search or scroll down to find the board you want to use.
The final step is to save and exit.

If your RSS feed is valid, Pinterest will show you a success message. If there is an issue with your URL, Pinterest will notify you. Your RSS feed will be checked on a daily basis, so you may have to wait up to 24 hours to see the new pins automatically posted to your board. Repeat the method for as many RSS feeds as you want to grow your Pinterest account on automatically.


